Introduction
Working on your vehicle comes about primarily for two reasons. One, you want to upgrade or improve something in your vehicle and two there is something you have to fix in order for it to keep working. For me it was the latter reason that forced me to replace my busted OEM starter.
I started noticing problems when I would be at my driveway and my car wouldn’t start immediately. It didn’t even make any noise for that matter. The radio would turn on and all the electronics seemed to function, yet as far as the ignition went, nothing happened when I turned the key. All I could hear was subtle clicking.
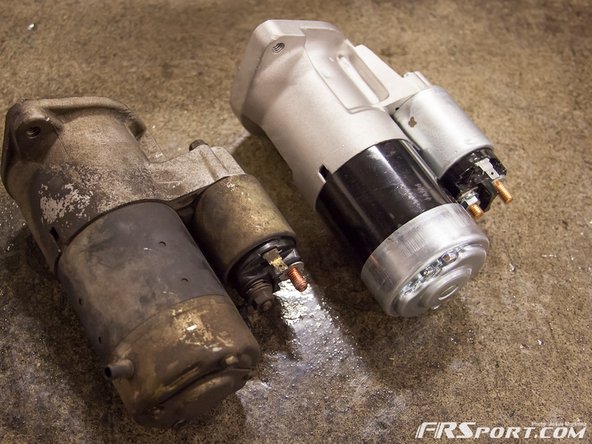
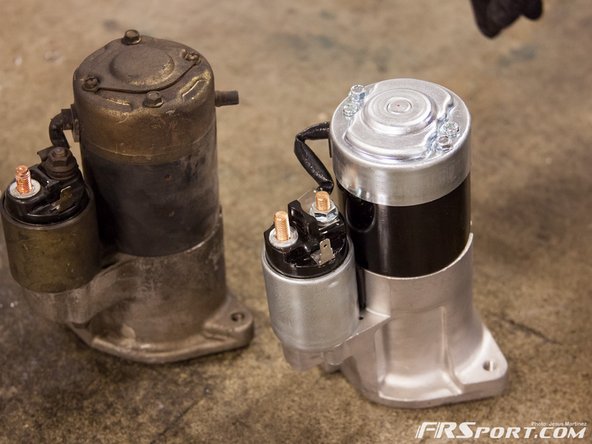
It was only until it happened at work that my boss and co-workers suggested that I check my starter. “How do I check my starter and make sure it isn’t anything else”, I asked. Someone suggested I bang on the OE starter and see if that would initiate ignition. So we went outside and banged on the starter which is located on the passenger side of the transmission bell housing. After doing so the car turned on and we were assured my starter was going out. Luckily for me I work at FRSport and we normally have SR20DET Aftermarket Starters in stock.
-
-
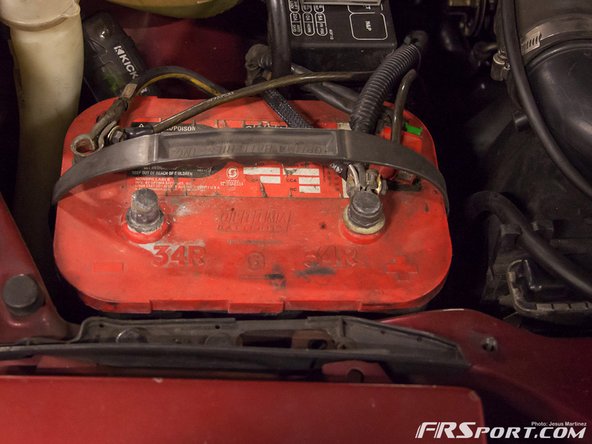
The very first thing you need to do is to remove the negative lead from your battery and secure it so that it won’t accidentally become loose and touch the post. There is a lot of electricity running to the starter and it is a perfect spot to get a nasty shock.
-
-
-
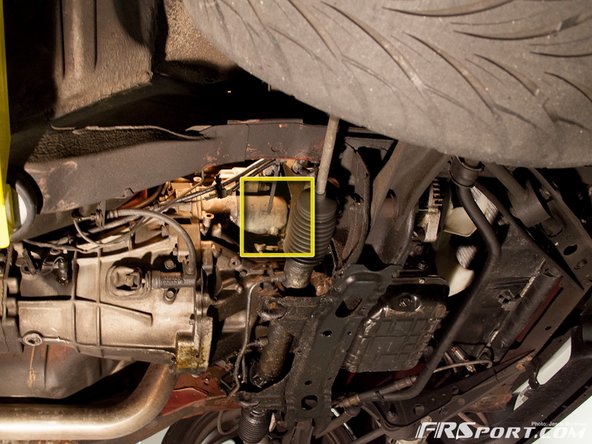
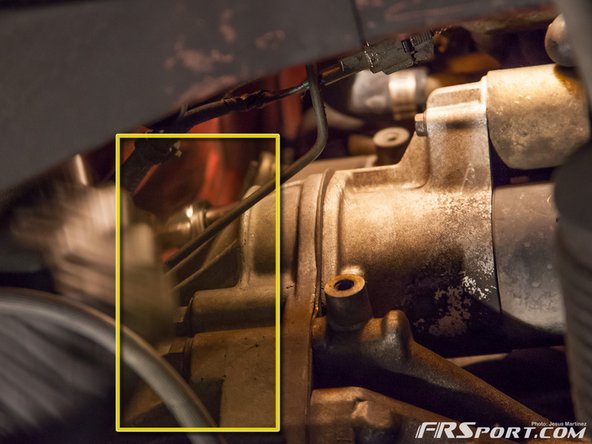
Raise your car to a comfortable level as it is way easier to attack this part from the bottom. The starter is located next to the SR20DET Bell Housing. It sits on the passenger side of it.
-
If you have an American 240sx it is very easy to get to and the following procedures demonstrate the removal and installation of the Circuit Sports Starter. If you have a JDM vehicle or a right hand drive conversion you might have a little bit of trouble removing the starter due to the driveshaft being in the way.
-
-
-
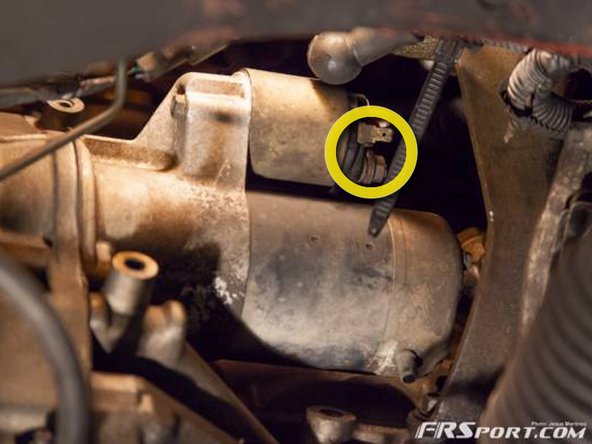
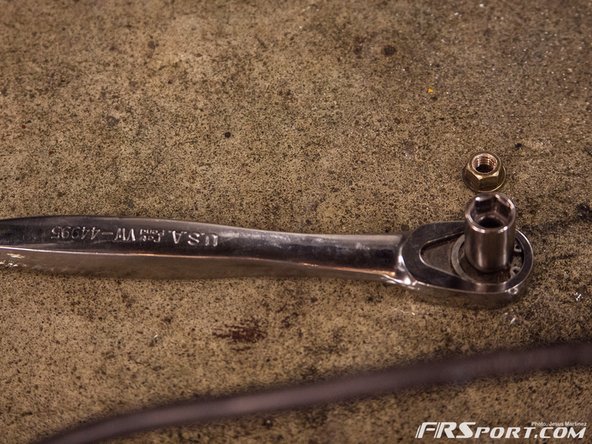
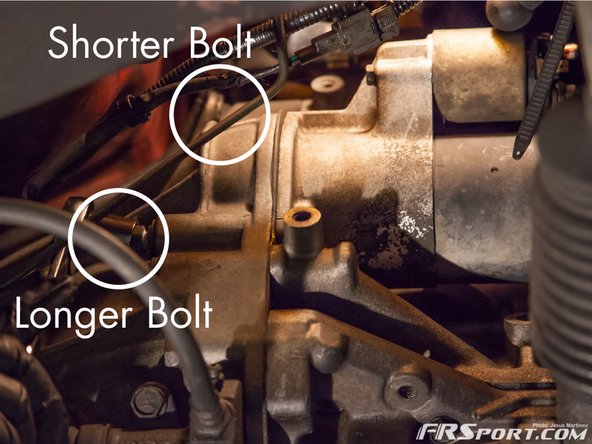
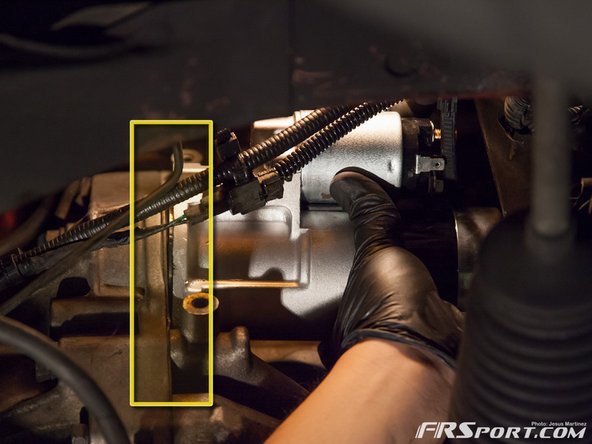
It doesn’t matter which one you take out first just remember that the shorter bolt is found towards the top of the starter/transmission and the longer bolt is located towards the bottom. These can sometimes be tightened very hard so you might want to apply some PB blaster before you attempt to remove them.
-
-
-
Installation is essentially the opposite of the removal although there is something to note upon installation. When you are mating the surfaces of the starter and the transmission together again, make sure that they seat properly.
-
There is a little ridge that has to connect in order for the two bolts you removed to connect or thread properly. Wiggle it if you must until you feel it is connected right.
-
-
-
After you have successfully connected everything together. Lower your car safely and connect the negative terminal of your battery. The circuit sports starter should start up without a problem, there is a little bit of a different sound emanating from it but it gets the job done. Cheers.
-